Completing an ADAS calibration is only part of the job. A shop should also be able to show why the calibration was required, which procedures were followed, what work was performed, and how the vehicle was verified before delivery.
A successful calibration report alone may not tell that full story. It may not identify the repair operation that triggered the requirement, document the vehicle’s pre-repair condition, or show that the proper setup and final quality checks were completed.
That is why ADAS documentation should begin at vehicle intake and continue through final delivery.
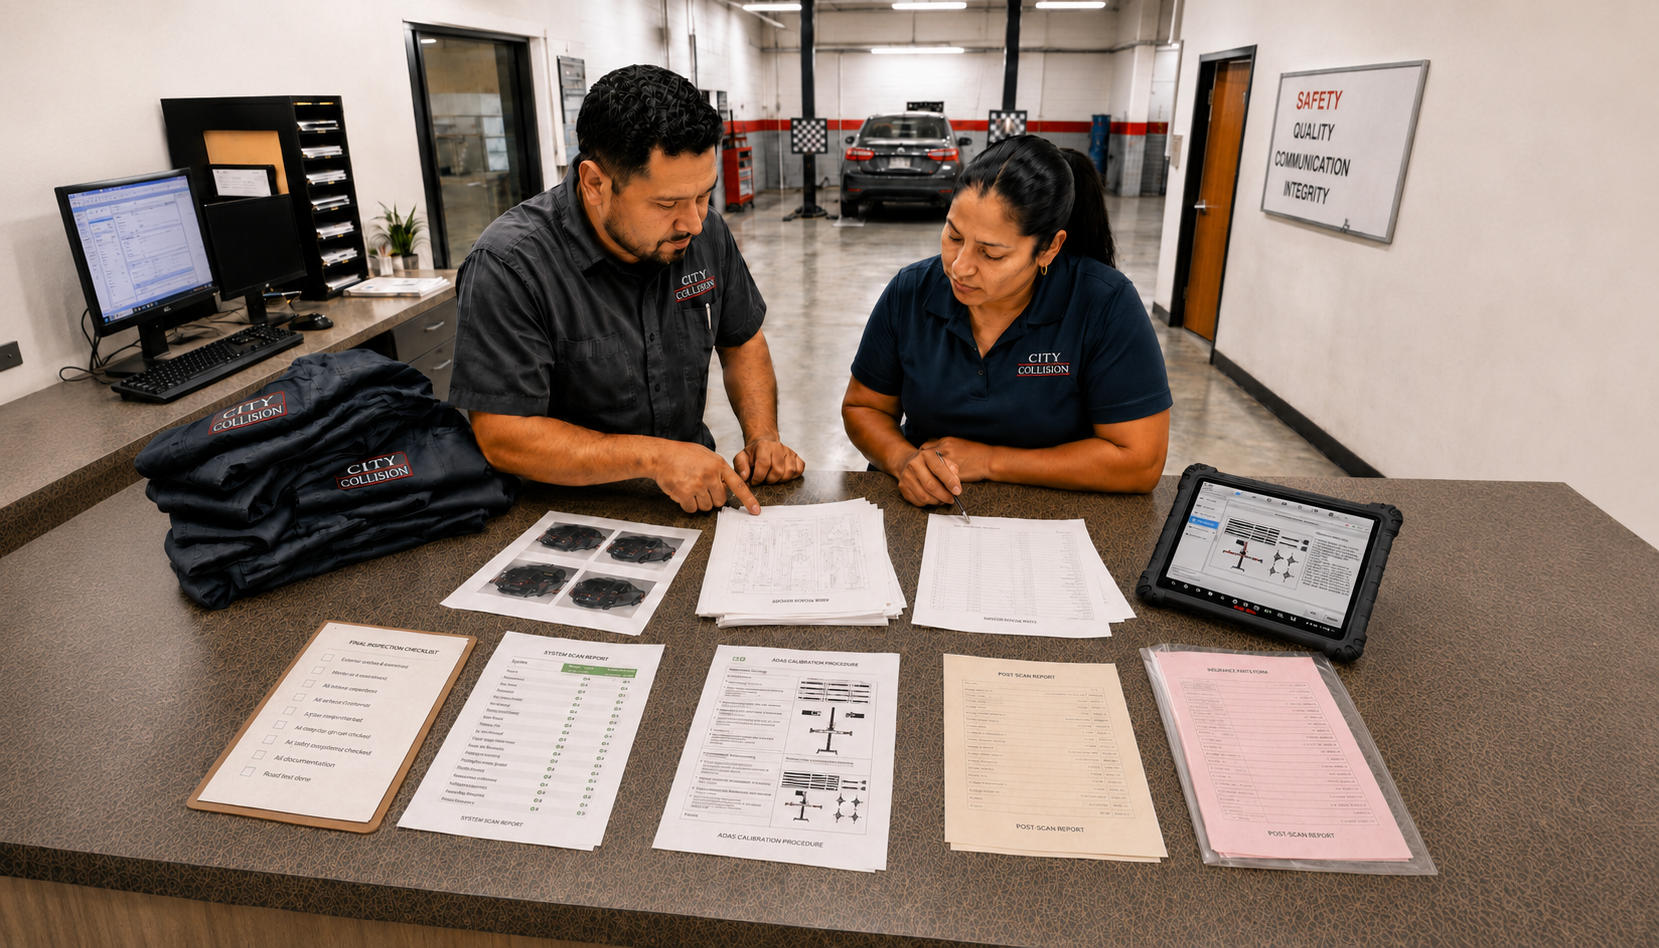
A complete repair file connects the damage, repair plan, OEM requirement, scan results, calibration procedure, and final verification. When those records are organized, they support insurer conversations, improve quality control, and create a clearer record of the work performed.
At Applied Automotive Technology, we know that even excellent calibration results can fall short without the right paperwork and processes behind them. Through our experience with collision repair shops, we have seen how clear documentation helps bring the entire process together. Here are a few practical tips to help make documentation a stronger part of your business.
Need help finding the right ADAS frame? Use our free ADAS Equipment Advisor.
Why ADAS Documentation Matters
ADAS calibrations may involve forward-facing cameras, radar sensors, blind-spot systems, surround-view cameras, and other safety-related technology.
Calibration can be required after a collision, but it may also be triggered by windshield replacement, bumper removal, structural repairs, suspension work, wheel alignment, sensor removal, or other repair operations.
The requirement is not always accompanied by a warning light or diagnostic trouble code. In many cases, it comes directly from the OEM repair procedure. Unplugging and reconnecting a component may still trigger a calibration requirement even when no warning light appears. A completed scan also does not prove that calibration was performed.
This makes documentation especially important. The shop should be able to demonstrate not only that a calibration was completed, but also how it determined that the calibration was necessary.
Our article, Liability and ADAS Calibration: Who’s Responsible When It Goes Wrong?, explains why shops need to follow OEM procedures, complete required scans and calibrations, and maintain records of the work. If those steps are unclear, the repair may be more difficult to defend.
Documentation also helps when an insurer questions a calibration charge. A line item such as “ADAS calibration” may not explain which system was affected, what operation triggered the requirement, or which OEM information supports it.
REVV’s ADAS 101: What Every Shop Must Know Before Getting Started recommends supporting ADAS charges with detailed estimate lines, scan results, OEM procedure information, and calibration completion documentation.
What Should Be in the Repair File?
A strong repair file should tell a clear story from intake through final quality control. The repair-order number should connect the estimate, supplements, photos, scans, OEM procedures, calibration report, and invoice.
It should generally include vehicle identification, damage photos, intake notes, pre- and post-repair scan reports, relevant OEM procedures, calibration prerequisites, the calibration report, technician notes, and final verification records.
The exact documentation will depend on the vehicle and procedure. A static calibration may require setup measurements and target-placement information, while a dynamic calibration may require road-test details.
The goal is to preserve enough information to show how the shop made its repair decisions and completed the required work.
Many calibration systems allow documentation to be stored with the individual repair order. If additional support is needed later, the shop can retrieve the vehicle record and print, download, or email the relevant calibration information.
Start With Vehicle Identification and Repair Planning
The file should identify the year, make, model, trim, VIN, mileage, and relevant factory options. The shop should also confirm which ADAS features are installed rather than assuming every vehicle within a model line has the same equipment.
Trim level, production date, sensor configuration, windshield type, and optional equipment can affect the procedure.
The repair plan should connect the damage and repair operations to the ADAS systems that may be affected. Front-end repairs may involve radar, cameras, sensor brackets, steering, suspension, or alignment. Rear bumper repairs may involve blind-spot or parking sensors. Windshield replacement may require camera calibration even when the camera itself was not damaged.
Identifying these relationships during repair planning helps prevent calibration requirements from being discovered after reassembly.
When disassembly reveals hidden damage, the supplement may add operations that trigger scans or calibrations. Estimate-review tools can help flag those requirements by comparing the repair operations with manufacturer information, but the shop should still confirm the vehicle-specific OEM procedure.

Include OEM Procedures and Position Statements
The repair file should show which source the shop used to determine that a scan or calibration was required.
That source may be a vehicle-specific repair procedure, calibration instruction, service manual, collision bulletin, or OEM position statement.
I-CAR’s OEM Position Statements resource explains how manufacturer statements can help shops make informed repair decisions. However, a general position statement should not replace research into the procedure for the specific vehicle and repair operation.
I-CAR also compiles Pre- and Post-Repair System Scanning Statements from vehicle manufacturers. Shops can also use OEM1Stop to locate automakers’ repair-information websites, although registrations or subscriptions may be required.
When saving an OEM procedure, the file should identify the repair operation that triggered the requirement and the section that applies.
Document the Scan Results
The pre-repair scan establishes an electronic baseline. It may identify diagnostic trouble codes, communication problems, warning-light conditions, voltage-related codes, or systems requiring further investigation.
CCC Intelligent Solutions notes in Diagnostics: Where Collision Repair Evolution Meets the ADAS Revolution that diagnostic scans have become increasingly common as late-model vehicles have added more ADAS and electronic systems.
The scan report should be saved and reviewed, not simply generated. The repair plan should explain how relevant findings were addressed and identify any pre-existing or unresolved conditions.
Embedded codes can prevent a calibration from being completed. In that situation, the shop should stop, document the problem, obtain authorization for any additional diagnostics, and record the correction before attempting the calibration again.
After repairs and calibration, the post-scan should be compared with the pre-scan. The file should show which codes were corrected, whether new codes appeared, and whether unresolved issues remain.
It is also important to separate scanning from calibration. Clearing a diagnostic code or turning off a dashboard light does not mean the related camera, radar, or sensor has been calibrated successfully.
Save the Calibration Report and Setup Details
The calibration report should identify the vehicle, system calibrated, procedure performed, technician, date, tool used, and final result.
Where available, it should include the VIN, mileage, calibration type, software information, and whether the procedure passed or failed.
The file should also show that required prerequisites were checked. Depending on the vehicle, these may include tire pressure, ride height, fuel level, steering-wheel position, alignment, battery voltage, target placement, floor level, lighting, or bay conditions.
A standardized checklist can help technicians document these conditions consistently, but it should support the OEM procedure, not replace it.
Useful photos may include the damage area, dashboard warning lights, vehicle position, calibration frame, targets, measurement points, battery support, or sensor mounting area.
Shops may also photograph the license plate or another vehicle identifier, the dashboard, and the successful calibration result. Photos should be purposeful, labeled, and connected to the correct repair order.
Document Sublet Work
When calibration is outsourced, the collision repair facility should still obtain and review the complete documentation.
A sublet invoice may show that a charge occurred, but not which system was calibrated, what procedure was followed, or whether the calibration was successful.
The file should include the provider’s calibration report, scan documentation, invoice, completion status, and notes about unresolved conditions. Before closing the repair order, the shop should confirm that the VIN matches, the correct system was calibrated, and the report shows a successful result.
The documentation standard should be the same whether calibration is performed in-house or sublet. The repair file should still show why the procedure was required, what work was performed, and whether it was completed successfully.
Final QC: Prove the Vehicle Was Verified
Calibration completion should lead into final verification, not automatically into delivery.
Final quality control should confirm that the post-scan was reviewed, warning lights and system messages were addressed, and any required road test was completed.
The repair file should ultimately answer four questions:
- Was the correct vehicle and ADAS system identified?
- Was the applicable OEM procedure researched and followed?
- Was the required calibration completed successfully?
- Was the vehicle verified before delivery?
Better Documentation Builds a Better ADAS Process
ADAS documentation should not be treated as paperwork added after the repair. It is part of the repair itself.
A complete file shows why calibration was required, what the scans revealed, which OEM procedures were followed, how the vehicle was prepared, what system was calibrated, and how the vehicle was verified.
That record supports reimbursement, internal quality control, accountability, and a more defensible repair process.
When documentation becomes part of the workflow from intake through delivery, shops do more than create better repair files. They build a more consistent, repeatable, and professional ADAS calibration process.
Good documentation starts with the right equipment, training, and workflow. If you are reviewing your current calibration process—or considering bringing more ADAS work in-house, our team is happy to help you think through the next steps.
Topics:
